Custom Android App Guide
By default IAMPASS will send authentication requests to the reference IAMPASS mobile application. IAMPASS Applications can be configured to send authentication requests to custom mobile applications. In this case the custom application is responsible for: * Registering the mobile device with IAMPASS * Collecting the required authentication data in response to authentication requests.
Installation
The easiest way to integrate IAMPASS into your application is to use the IAMPASS Libray, which is available from the Maven repositiory. Add the folowing to your project’s build.gradle:
dependencies {
    implementation 'com.iampass.iampass:iampass:1.1.3'
}
Getting Started
Create an IAMPASS Account and Application
The first stage in integrating IAMPASS into your applicaton is to create an IAMPASS Application as described here.
Save the application id and application secret for your IAMPASS Application you will need them to communicate with IAMPASS.
Add the IAMPASSframework to your project
Add the folowing to your project’s build.gradle:
dependencies {
    implementation 'com.iampass.iampass:iampass:1.1.3'
}
Application Configuration
Enable Push Notifications
IAMPASS uses Push Notifications to notify users of Authentication Requests. Use the Android Studio Firebase Assistant to add In App Messaging to your application (Tools -> Firebase).
Configure IAMPASS Notifications Credentials
- In order to send Push Notifications to your application you need to configure your IAMPASS application:
Get the FCM API Key for your application. This can be found in the file google-services.json that was added to your project when you enabled FCM.:
"api_key": [
{
  "current_key": "XXXXXXXXXXXXXXXXXXXX"
}]
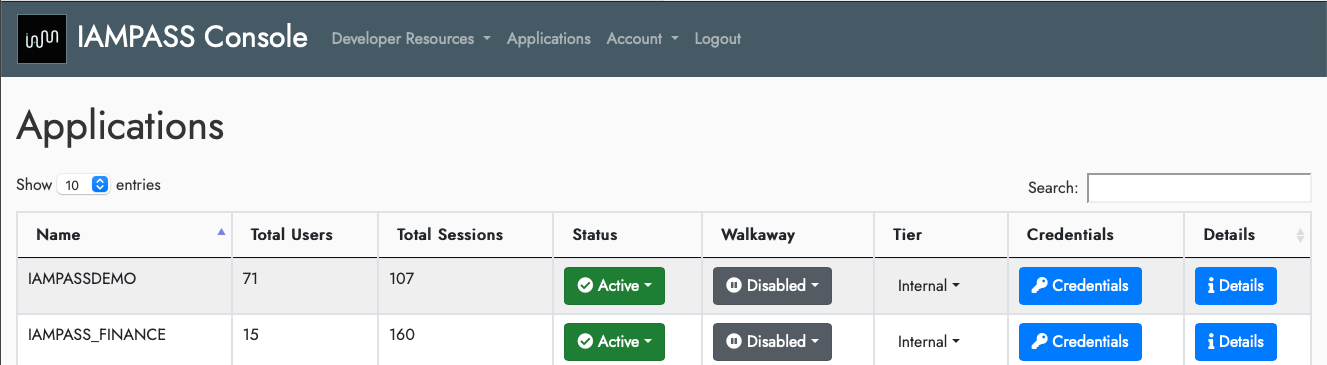
Open the IAMPASS Console
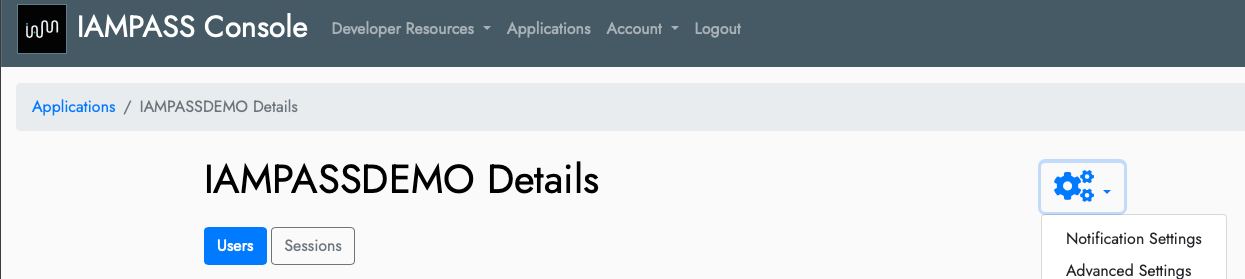
Select your application and click the Details button.
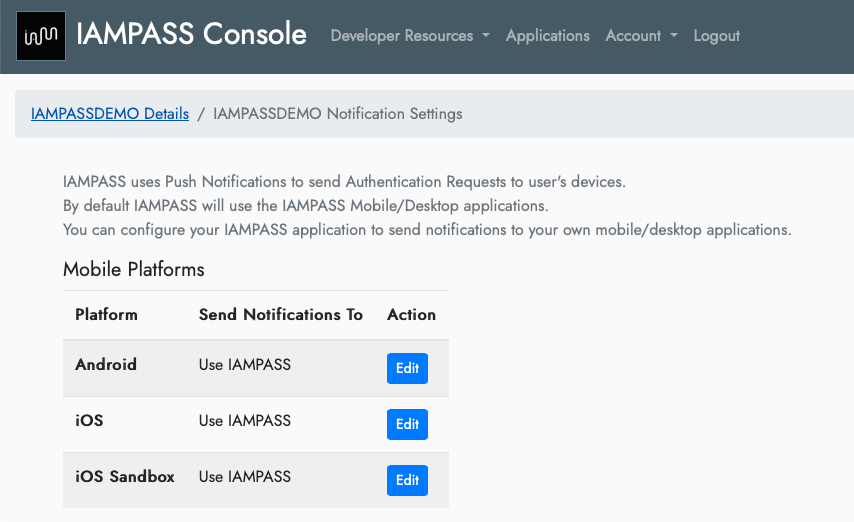
In the details page click the settings icon and select Notification Settings.
On the Notifications Settings page click the Edit button for iOS.
On the Android Notification Settings page select Custom Android App from the dropdown.
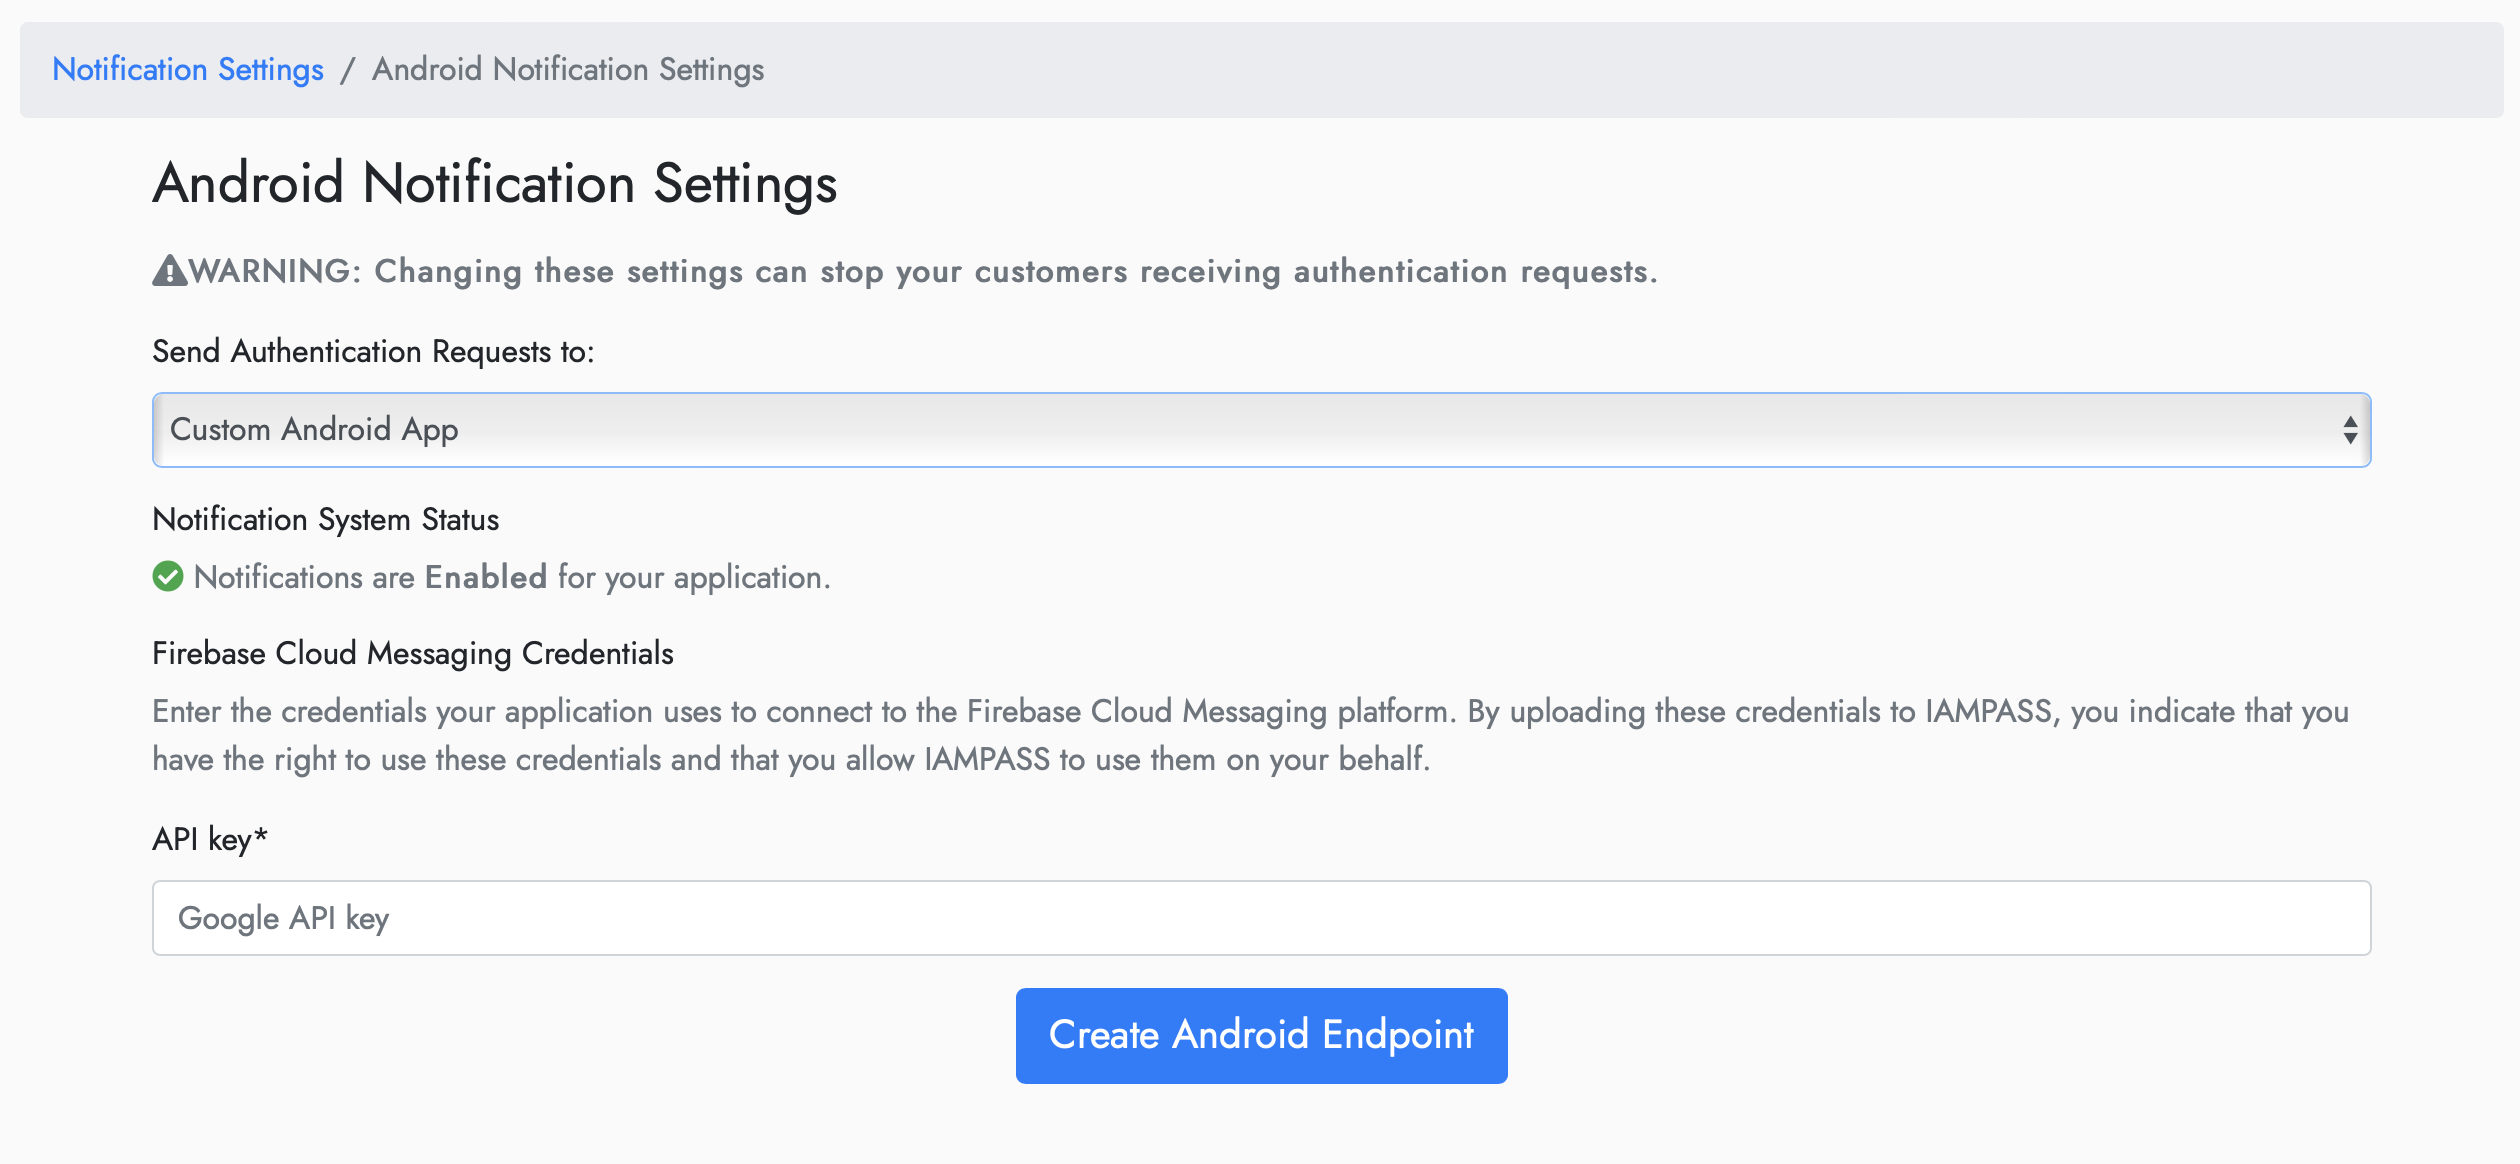
Update the credentials with your FCM API Key.
IAMPASS will now route your users authentication requests to your Android application.
Applications Entitlements
IAMPASS use Camera and Bluetooth services on your user’s mobile device. You must add the following permissions to your application’s manifest:
<manifest xmlns:android="http://schemas.android.com/apk/res/android"
    package="XXX">

    ...

    <uses-permission android:name="android.permission.BLUETOOTH_ADVERTISE" />
    <uses-permission android:name="android.permission.BLUETOOTH_CONNECT" />
    <uses-permission android:name="android.permission.INTERNET" />
    <uses-permission android:name="android.permission.CAMERA" />
    <uses-permission android:name="android.permission.USE_BIOMETRIC" />
    <uses-permission android:name="android.permission.BLUETOOTH" />
    <uses-permission android:name="android.permission.BLUETOOTH_ADMIN" />
    <uses-feature
        android:name="android.hardware.bluetooth_le"
        android:required="true" />
    ...
Setup Main Activity
The IAMPASS library provides an Activity IPMainActivity that performs most IAMPASS operations. You should derive your applications main activity from IPMainActivity.:
import com.iampass.iampass.ui.IPMainActivity
...
class MainActivity : IPMainActivity() {

private lateinit var appBarConfiguration: AppBarConfiguration
private lateinit var binding: ActivityMainBinding

override fun iampassInitialized() {

    Toast.makeText(applicationContext,"Initialized", Toast.LENGTH_SHORT).show()
}

override fun handleApplicationNotification(remoteMessage: com.google.firebase.messaging.RemoteMessage) {
}
IPMainActivity has two abstract members::
override fun iampassInitialized() {
}
This method is called when IAMPASS has finished updating the user information stored on the device.:
override fun handleApplicationNotification(remoteMessage: com.google.firebase.messaging.RemoteMessage) {

}
IPMainActivity has code to handle IAMPASS notifications. If the application receives a notification which is not an IAMPASS notification the application can handle them here.
User Storage
IAMPASS needs to store information about the users regeistered on the device. The class IPUserManager is used to store the data.
The IPUserManager instance must be created before other IAMPASS functions are used.
The recommended way to do this is to create a custom Application object and call IPUserManager.create in its init method.:
import com.iampass.iampass.IPDefaultSerializer
import com.iampass.iampass.IPUserManager

class ExampleApplication: Application() {

    init {
        IPUserManager.create(IPDefaultSerializer(application = this, "IAMPASS_EXAMPLE_DATA"))
    }
}
To create the custom Application it is necessary to modify the app’s manifest file (AndroidManifest.xml).:
<manifest xmlns:android="http://schemas.android.com/apk/res/android"
    ...>

    <application
        android:name=".ExampleApplication"
IPUserManageruses an object that implementsIPUserSerializerto store information. The providedIPDefaultSerializeusesEncryptedSharedPreferences. To use a different serializer:Create a new class derived from
IPDefaultSerializer.Pass an instance of the custom serializer to
IPUserManager.create.
Key Concepts
- When a system uses IAMPASS to authenticate its users
A notification is sent to the users registered device.
The registered device collects the required information and send it to IAMPASS.
IAMPASS processes the collected data and makes an authentication decision.
A custom IAMPASS mobile device is responsible for: * Registering the user’s device. * Processing notifications from IAMPASS. * Collecting the required data.
Registering Users
IAMPASS does not manage your users or replace your sign up flow. You register your user with IAMPASS by providing a token that you can relate back to your user See Getting Started for information about user management. There are 2 common registration flows:
User registers using your mobile application.
User registers externally (in a web browser for example).
You must wait until your application has completed the Push Notification registration process before registering devices
Mobile Application Registration
The IAMPASS Android framework provides an interface for registering users and their mobile device. This example assumes that the mobile application has: * Registered for Push Notifications and stored the returned token in NOTIFICATION_TOKEN * Registered the user user with its own system.
- User registration is performed by an
Activity, which is launched usingIPRegisterUserContract import com.iampass.iampass.ui.IPRegisterUserContract import com.iampass.iampass.ui.IPRegisterUserParams // Create the registration launcher. // The launcher must be created before the calling activities onCreate is called. val registerLauncher = registerForActivityResult(IPRegisterUserContract()) {result-> if (result.success){ // Registration complete }else{ // Registration failed } } /** * Register a user * @param userID an identifier for the user. */ fun registerUser(userID: String){ val applicationID = getString(R.string.TEST_APPLICATION_ID) val applicationSecret = getString(R.string.TEST_APPLICATION_SECRET) val serverURL = getString(R.string.TEST_APPLICATION_SERVER) val urParams = IPRegisterUserParams( userName=userName, applicationID = XXXXX_APPLICATION_ID_XXXX, applicationSecret=XXXX_APPLICATION_SECRET_XXXX) ) ) registerLauncher.launch(urParams) }
The IAMPASS Android framework includes a UI that is displayed when the user is being displayed. The UI used standard Android colors and fonts. You can customize the appearance using Android Themes or by providing a layout in your application called activity_register_user.xml. The layout must contain a TextView and a ProgressBar:
<androidx.constraintlayout.widget.ConstraintLayout xmlns:android="http://schemas.android.com/apk/res/android"
xmlns:app="http://schemas.android.com/apk/res-auto"
xmlns:tools="http://schemas.android.com/tools"
android:layout_width="match_parent"
android:layout_height="match_parent">

    <ProgressBar
        android:id="@+id/ip_register_user_progress"
        ...
    />

    <TextView
        android:id="@+id/ip_register_user_label"
        ... />
    ...
</androidx.constraintlayout.widget.ConstraintLayout>
External Registration
If you prefer for your users to register on a website, your users will have to register their mobile device. IAMPASS provides an API that can be used to obtain a registration link that can be used to register a mobile device. There are 2 ways to register the device: 1) Obtain a registration link in a web application and share it with your user. Call the registration URL from your mobile application, providing the information required to register the device.
import com.iampass.iampass.*

// Get the FCM token
FirebaseMessaging.getInstance().token
    .addOnCompleteListener(OnCompleteListener { task ->
        if (task.isSuccessful) {

            val notificationToken = task.result

            val registrationLink = URL("XXXX_EXTERNAL_REGISTRATION_LINK_XXXX")

            val userID: String = "IDENTIFIER FOR USER"

            // Successfully obtained a registration link so now register this device.
            IPUser.register(
                appContext = this.applicationContext,
                identifier = userID,
                registration_link = registrationLink,
                notification_token = notificationToken,
                completion = IPUser.RegisterUserCallback(
                    success = { identifier, user ->
                        IPUserManager.instance.addUser(identifier, user)
                        IPUserManager.instance.save()
                        // DONE
                    },
                    failure = { identifier, error ->
                        // Failed to register device.
                        // DONE
                    })
            )
        }
    })
Obtain the registration link in your mobile application, collect the required information and call the registration URL.
import com.iampass.iampass.*


// Get the FCM token
FirebaseMessaging.getInstance().token
    .addOnCompleteListener(OnCompleteListener { task ->
        if (task.isSuccessful) {

            val notificationToken = task.result

            val managementAPI = IPManagementAPI(
                applicationContext = this.applicationContext,
                application_id = XXXX_APPLICATION_ID_XXXX,
                application_secret = XXXX_APPLICATION_SECRET_XXXX
            )

            val userID: String = "IDENTIFIER FOR USER"
            val displayName: String = "VALUE TO DISPLAY FOR USERNAME"

            // Get a registration link for the user.
            managementAPI.getRegistrationLink(userID,
                displayName,
                IPManagementAPI.GetRegistrationLinkCallback(
                    success = { registration_link ->
                        // Successfully obtained a registration link so now register this device.
                        IPUser.register(
                            appContext = this.applicationContext,
                            identifier = userID,
                            registration_link = registration_link,
                            notification_token = notificationToken,
                            completion = IPUser.RegisterUserCallback(
                                success = { identifier, user ->
                                    IPUserManager.instance.addUser(identifier, user)
                                    IPUserManager.instance.save()
                                    // DONE
                                },
                                failure = { identifier, error ->
                                    // Failed to register device.
                                    // DONE
                                })
                        )
                    },
                    failure = { error ->
                        // Failed to get registration link
                        // DONE
                    }
                ))
        }
    })
Storing Device Information
The client application should store the IPUser instance returned by device registration.
IPUserManager can be used to store the user data.
Before using IPUserManager, IPUserManager.create must be called passing in an IPUserSerializer instance that is responsible for serializing the data. IAMPASS includes the class IPDefaultSerializer which stores the user data using EncryptedSharedPreferences.
Training
After a device has been registered IAMPASS may have to collect some training data for the user.
After registration check the trainingRequired property of IPUser to determine if IAMPASS needs to perform training.
if user.trainingRequired{
    // Perform training...
}
The IAMPASS Android framework includes the IPFacialTrainingActivity which provides the UI for performing training. To launch the activity us IPFacialTrainingContract. The IAMPASS iOS framework provides a default UI for performing training.
// Launcher for the facial training activity.
// This must be created before this Activity's `onCreate` is called.

private val facialTrainingLauncher = registerForActivityResult(IPFacialTrainingContract()) { result->
    if(result.failed.isNotEmpty()){
        // Some users failed to train.
        // result.failed contains a Map<String,IPUser> containing the failed users.
    }
    }else{
        // Training completed.
    }
}

// Launch the training activity
val usersToTrain: Map<String,IPUser> = ...
facialTrainingLauncher.launch(IPFacialTrainingParams(usersToTrain))
The IAMPASS Android framework contains a standard UI for training. You can customize the apperance using Android Themes or by creating the following layouts:
activity_facial_training.xml This displays a message informing the user that the app need to perform training.
<androidx.constraintlayout.widget.ConstraintLayout xmlns:android="http://schemas.android.com/apk/res/android"
    xmlns:app="http://schemas.android.com/apk/res-auto"
    xmlns:tools="http://schemas.android.com/tools"
    >

    <TextView
        android:id="@+id/ip_training_instructions_label"
        />

    <Button
        android:id="@+id/ip_training_start_button"
        />

    <ProgressBar
        android:id="@+id/ip_upload_progress"
        />
</androidx.constraintlayout.widget.ConstraintLayout>
2) activity_face_capture.xml This actually does the image capture. The CameraView provides the video overlay. The ImageView draws the head outline over the video preview. If you provide your own layout you will have to add api ‘com.otaliastudios:cameraview:2.7.2’ to the dependencies of your application build.gradle.
<androidx.constraintlayout.widget.ConstraintLayout xmlns:android="http://schemas.android.com/apk/res/android"
android:background="#FF444444">
    <com.otaliastudios.cameraview.CameraView
        android:id="@+id/camera"
        android:keepScreenOn="true"
        app:cameraAudio="off"
        app:cameraEngine="camera2"
        app:cameraFacing="front"
        >

        <ImageView
            android:id="@+id/image_overlay"
            android:contentDescription="@string/ip_background_face_overlay"
            android:scaleType="fitXY"
            app:layout_drawOnPictureSnapshot="false"
            app:layout_drawOnPreview="true"
            app:layout_drawOnVideoSnapshot="false"
             />
    </com.otaliastudios.cameraview.CameraView>

    <Button
        android:id="@+id/button_Cancel"
     />

    <ProgressBar
        android:id="@+id/faceProgress"
        style="@android:style/Widget.ProgressBar.Horizontal"
         />
</androidx.constraintlayout.widget.ConstraintLayout>